Apart from above issues, some users seem to complain about Action Center showing the same notification even after clearing it so many times. So without wasting any time let’s see how to Fix Action Center Not Working in Windows 10 issue with the help of the below-listed troubleshooting guide.
Action Center Not Working in Windows 10 [SOLVED]
Make sure to create a restore point, just in case something goes wrong.
Action Center Not Working in Windows 10 [SOLVED] Method 1: Restart Windows Explorer Method 2: Run SFC and DISM Method 3: Make sure Windows is up to date Method 4: Run Disk Defragmentation Method 5: Rename Usrclass.dat File Method 6: Turn Off Transparency Effects Method 7: Use PowerShell Method 8: Perform Clean Boot Method 9: Run CHKDSK Method 10: Registry Fix Method 11: Perform System Restore Method 12: Run Disk Cleanup
Method 1: Restart Windows Explorer
1.Press Ctrl + Shift + Esc keys together to launch the Task Manager. 2.Find explorer.exe in the list then right-click on it and select End Task.
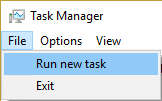
3.Now, this will close the Explorer and in order to run it again, click File > Run new task.
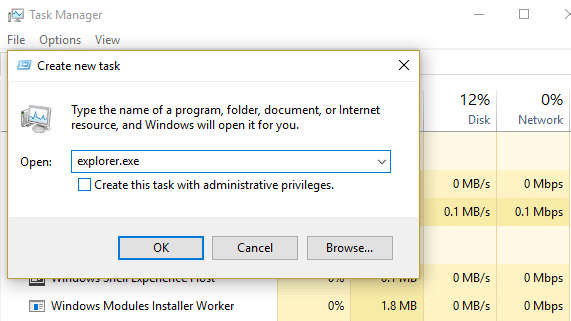
4.Type explorer.exe and hit OK to restart the Explorer.
5.Exit Task Manager and this should Fix Action Center Not Working in Windows 10.
Method 2: Run SFC and DISM
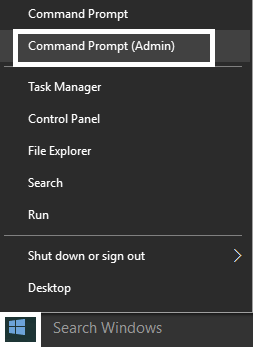
1.Press Windows Key + X then click on Command Prompt(Admin).
2.Now type the following in the cmd and hit enter:
3.Wait for the above process to finish and once done restart your PC. 4.Again open cmd and type the following command and hit enter after each one:
5.Let the DISM command run and wait for it to finish. 6. If the above command doesn’t work then try on the below: Note: Replace the C:\RepairSource\Windows with the location of your repair source (Windows Installation or Recovery Disc). 7.Reboot your PC to save changes and see if you’re able to Fix Action Center Not Working in Windows 10.
Method 3: Make sure Windows is up to date
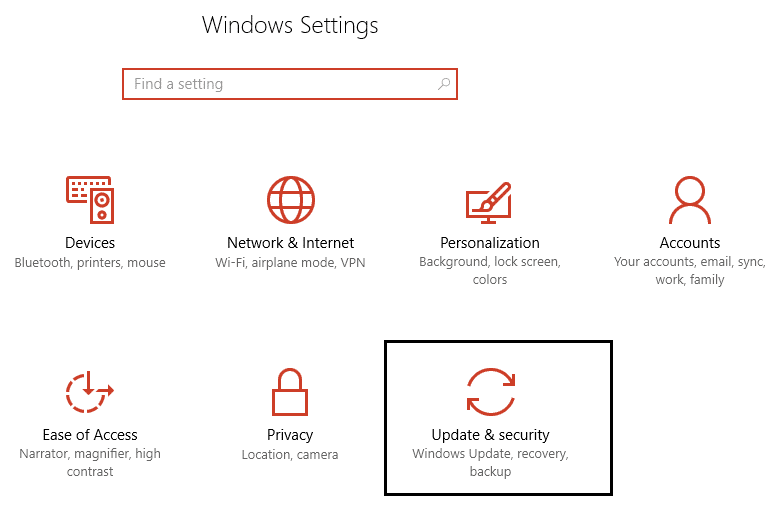
1.Press Windows Key + I then select Update & Security.
2.Next, again click Check for updates and make sure to install any pending updates.
3.After the updates are installed reboot your PC and see if you’re able to Fix Action Center Not Working in Windows 10.
Method 4: Run Disk Defragmentation
1.Press Windows Key + R then type dfrgui and hit Enter to open Disk Defragmentation.
2.Now one by one click Analyze then click Optimize for each drive to run disk optimization.
3.Close the window and reboot your PC to save changes. 4.If this doesn’t fix the issue then download Advanced SystemCare. 5.Run Smart Defrag on it and see if you’re able to Fix Action Center Not Working in Windows 10.
Method 5: Rename Usrclass.dat File
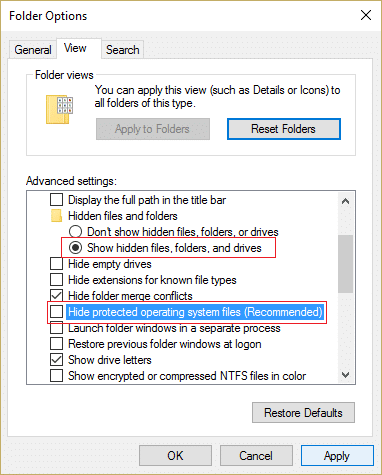
1.Press Windows Key + R then type %localappdata%\Microsoft\Windows and hit Enter or you could manually browse to the following path: C:\Users\Your_Username\AppData\Local\Microsoft\Windows Note: Make sure show hidden file, folders, and drives is check marked in Folder Options.
2.Now look for UsrClass.dat file, then right-click on it and select Rename.
3.Rename it as UsrClass.old.dat and hit Enter to save changes. 4.If you get an error message saying “Folder in use the action can’t be completed” then follow the steps listed here.
Method 6: Turn Off Transparency Effects
1.Right-click on Desktop in an empty area and select Personalize.
2.From left-hand menu select Colors and scroll down to More options. 3.Under More options disable the toggle for “Transparency effects“.
4.Also uncheck “Start, taskbar, and action center” and “Title bars.” 5.Close Settings and reboot your PC.
Method 7: Use PowerShell
1.Type powershell in Windows Search then right-click on it and select Run as Administrators.
2.Copy and paste the following command in PowerShell window:
3.Press Enter to run the above command and wait for it to finish processing. 4.Reboot your PC to save changes.
Method 8: Perform Clean Boot
Sometimes 3rd party software can conflict with Windows and can cause the issue. In order to Fix Action Center Not Working issue, you need to perform a clean boot on your PC and diagnose the issue step by step.
Method 9: Run CHKDSK
1.Press Windows Key + X then select “Command Prompt (Admin).”
2.In the cmd window type the following command and hit Enter: chkdsk C: /f /r /x
Note: In the above command C: is the drive on which we want to run check disk, /f stands for a flag which chkdsk the permission to fix any errors associated with the drive, /r let chkdsk search for bad sectors and perform recovery and /x instructs the check disk to dismount the drive before beginning the process. 3.It will ask to schedule the scan in the next system reboot, type Y and hit enter. Please keep in mind that CHKDSK process can take up a lot of time as it has to perform a lot of system level functions, so be patient while it fixes system errors and once the process is finished it will show you the results.
Method 10: Registry Fix
1.Press Windows Key + R then type regedit and hit Enter to open Registry Editor.
2.Navigate to the following Registry Key:
HKEY_CURRENT_USER\SOFTWARE\Policies\Microsoft\Windows
3.Look for Explorer key under Windows, if you can’t find it then you need to create it. Right-click on Windows then select New > key.
4.Name this key as Explorer and then again right-click on it and select New > DWORD (32-bit) value.
5.Type DisableNotificationCenter as the name of this newly created DWORD. 6.Double-click on it and change it’s value to 0 and click OK.
7.Close Registry Editor and reboot your PC. 8.See if you’re able to Fix Action Center Not Working in Windows 10, if not then continue. 9.Again open Registry Editor and navigate to the following key: HKEY_LOCAL_MACHINE\Software\Microsoft\Windows\CurrentVersion\ImmersiveShell 10.Right-click on ImmersiveShell then select New > DWORD (32-bit) value.
11.Name this key as UseActionCenterExperience and hit Enter to save changes. 12.Double-click on this DWORD then change it’s value to 0 and click OK.
13.Close Registry Editor and restart your PC.
Method 11: Perform System Restore
1.Press Windows Key + R and type”sysdm.cpl” then hit enter.
2.Select System Protection tab and choose System Restore.
3.Click Next and choose the desired System Restore point.
4.Follow the on-screen instruction to complete system restore. 5.After reboot, you may be able to Fix Action Center Not Working in Windows 10.
Method 12: Run Disk Cleanup
1.Go to This PC or My PC and right click on the C: drive to select Properties.
3.Now from the Properties window click on Disk Cleanup under capacity.
4.It will take some time in order to calculate how much space Disk Cleanup will be able to free.
5.Now click Clean up system files in the bottom under Description.
6.In the next window that opens make sure to select everything under Files to delete and then click OK to run Disk Cleanup. Note: We are looking for “Previous Windows Installation(s)” and “Temporary Windows Installation files” if available, make sure they are checked.
7.Wait for Disk Cleanup to complete and see if you are able to Fix Action Center Not Working in Windows 10. Recommended:
How to Show File Extensions in Windows 10 How to Reset Network Data Usage on Windows 10 Fix Nvidia Kernel Mode Driver has stopped responding How to disable the Task View Button in Windows 10
That’s it you have successfully Fix Action Center Not Working in Windows 10 but if you still have any queries regarding this post then feel free to ask them in the comment’s section.


